Tuesday 29 October 2019

'Spooky and Creepy Tag' for Tando Creative

Hello!

As we are heading towards Halloween, this week the theme on the Tando Creative blog is Spooky and Creepy and I decided to decorate one of the technique binder tags...


I started by using the small cobweb stencil by Tando Creative with crackle paste.  This was done at the top and the bottom of the tag and I filled in any spaces in between with more paste.  To make sure my webs all looked joined up I used my pokey tool to make some of the lines longer, scraping back the paste.

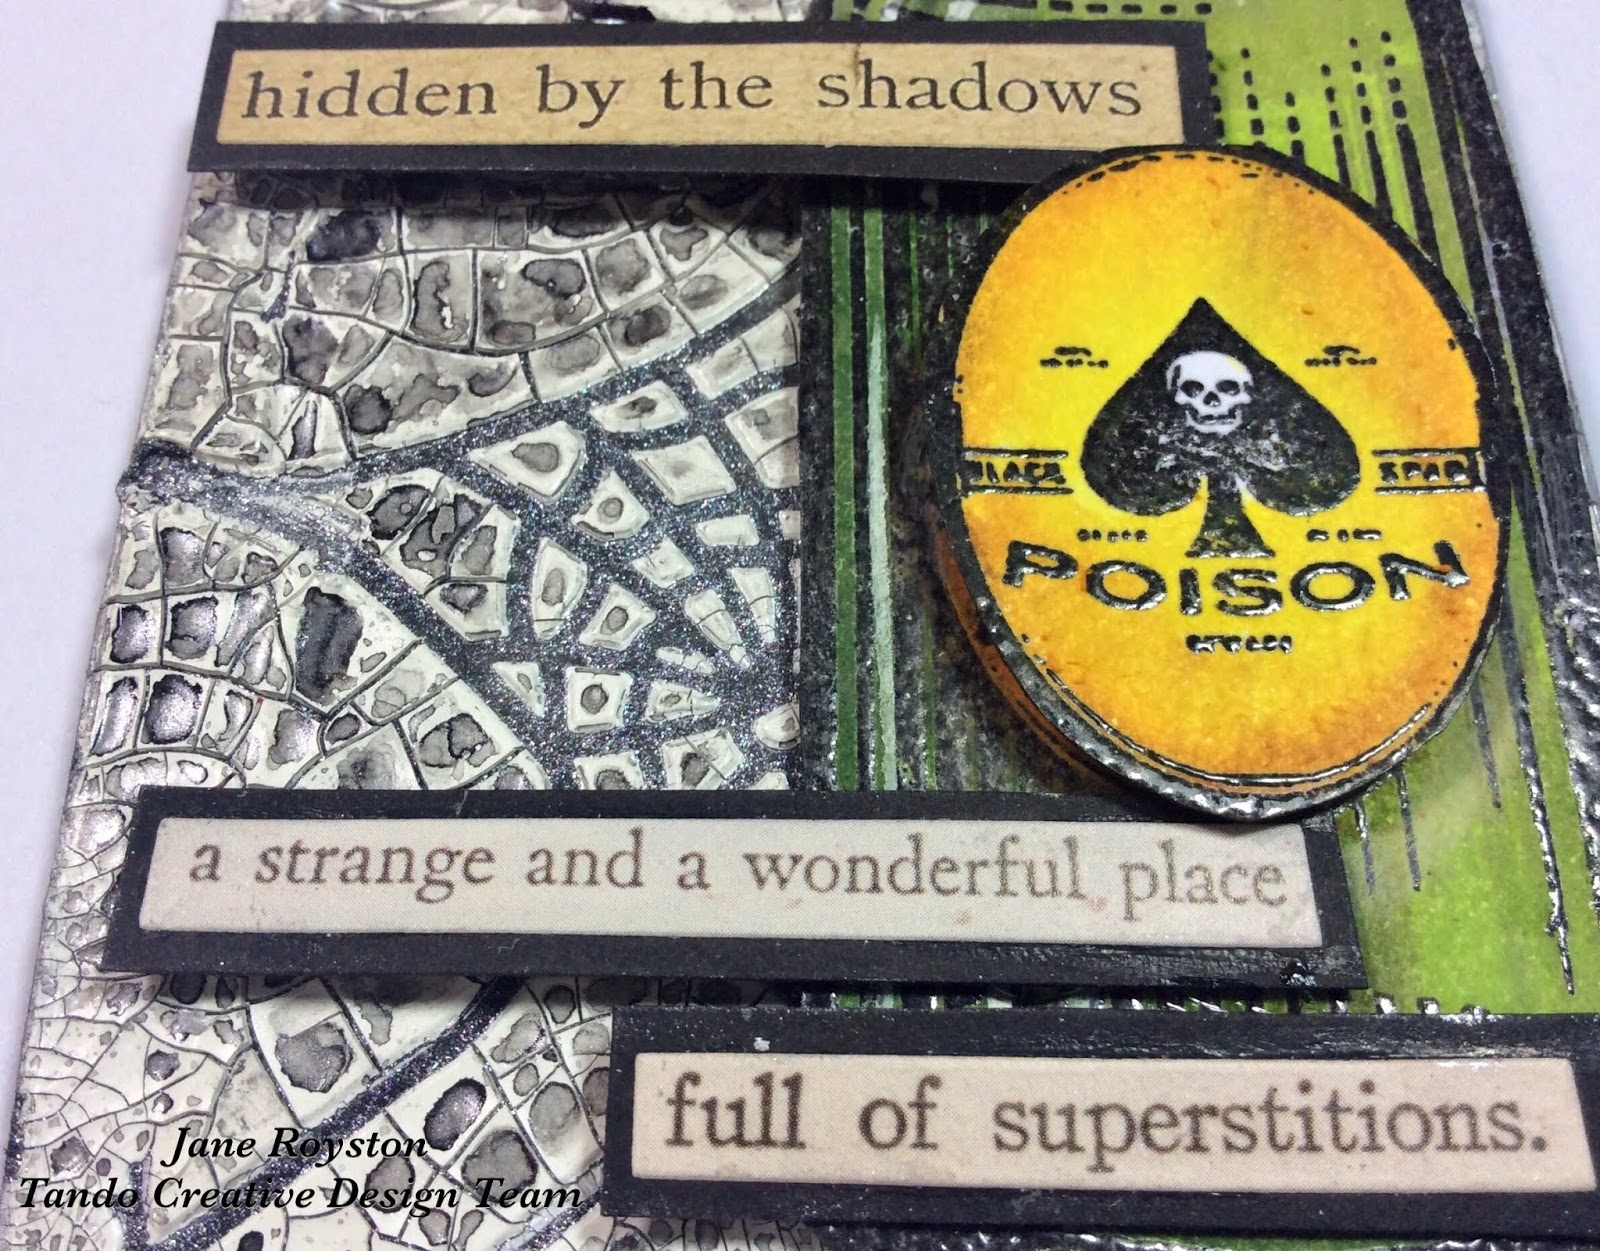
Once this had dried and cracked I used a shimmery spray ink in metallic silver to add colour.  I liked the way the colour soaked into the exposed grey board areas but left the crackle paste quite light and decided to leave the colour like that...


Using a spider from the Tando grab bag, I added some texture sand paste then once it was dry used purple paint and silver gilding wax.

I stamped out the poison bottle using a Bee Crafty stamp from my stash, this then had clear embossing powder added.  A bit of colour was added using Faber Castell pens then I re stamped the label to add another layer to the bottle.

The words were chosen from the Tim Holtz clippings set, and I picked 3 that I thought went with the spooky theme which I backed onto black card for extra stability...


Here are the links to the products used:

Technique Binder and Tags
Grab Bag of Spiders
4" x 4" Stencil - Cobweb
Decoart Media Line - Crackle Paste; Texture Sand Paste

There will be more spooky projects this week from the rest of the team so do please pop back to see them.

Thank you for looking and happy crafting!

Jane xx

Saturday 26 October 2019

HOCHANDA samples for Bee Crafty

Hello!

On the Buzzy Goings on at Bee Crafty blog this week I am sharing the samples that I made for the most recent HOCHANDA shows with the stamp sets designed by Sam!...


If you missed either of the shows they will be available on rewind on the HOCHANDA website, look for the shows on Tuesday 22nd October.

Thank you for looking and happy crafting!

Jane xx

Monday 21 October 2019

'Snowflake Tag' with HunkyDory Crafts

Hello!

I have a new project today using some products sent to me by HunkyDory Crafts.

Full disclosure: I have been given these products to review for free and to keep, however any views I have are my own and will be totally honest.

There is a video over on my YouTube channel showing the process of me creating this project which is a Snowflake themed tag, you can view it by clicking on this link https://youtu.be/4SAcZUXjwow


The products I received were:


* I started by using the watercolour card to create a tag.  The card is 280gsm and is a nice thickness but still easy to cut images out of.  It has a textured surface but is much smoother than other watercolour card I have used which made it ideal for getting a good stamped image on.
I used quite a lot of water on the card and it held up very well, flattening out completely once dried.  The surface remained intact throughout the use of water and ink spray and adding layers with the powders, ink and heat embossing.

* The glimmer sprays that I chose were Silver Dollar and White Frost.  These have a pearlescent finish with mica added.  You can see the mica at the bottom of the spray bottles so they do need mixing thoroughly and there is a ball bearing inside to help with this.  Both of the bottles sprayed my project cleanly and evenly but I would need to check them over time to see if this remains the case.  The silver is lovely and pigmented and gave a really good coverage.  The white is somewhat more translucent so if you are looking for a bright white ink that really stands out this may not be for you.  I used the white to create more of a water stained effect (you can see this in the video) but I have yet to try it on different card colours.


*  Next I used the embossing ink pad in two ways, one with the pigment powders and two with embossing powder.  I have a very sensitive sense of smell so the first thing I noticed was that the ink pad does have a very distinctive odour which I was not keen on.  It was not bad enough to stop me using it but for some people this could be an issue!  The pad seemed a bit less juicy than others I have used but it stayed wet long enough to use with the stamps and the powders, which both adhered to the ink successfully.

* Finally I also used the Sparkling Snowflake stamp set.  The stamps that HunkyDory produce are always good quality and these are no different.  You can see in the video and photos that they stamp out clearly and in detail, even when using pigment powder on top they are totally crisp. This set had a good selection of different sized snowflakes that all work together and also sentiments that are not only for Christmas cards but make good projects for any winter themes.


If you would like to see these products in action you can view the video at
https://youtu.be/4SAcZUXjwow

You can find all the products on the HunkyDory website: https://www.hunkydorycrafts.co.uk/
Or you can link directly to the products used by clicking on them here:

* Watercolour Cardstock
* Prism Glimmer Mists
* Embossing Ink Pad
* 'Sparkling Snowflakes' Stamp Set

Thank you for looking and happy crafting!

Jane xx


Saturday 19 October 2019

'Autumnal Toadstools' Art Journal Spread for Bee Crafty

Hello!

On the Buzzy Goings on at Bee Crafty Blog today I have done a bit of art journaling!  I was inspired by the recent doodle art stamps that Bev and Sam brought to HOCHANDA and also the seasonal weather...


I used my 6" watercolour journal with extra thick paper as I knew that I was going to use brusho powders for my base layer with lots of water!  I used dark brown, gamboge, yellow, orange and leaf green powders to create an autumnal feel...


To create a bit more of a frame to the spread I added some brown distress crayon around the edges then used one of the sentiment stamps from the Maple Leaf set with sepia archival along the sides...


Next I added some stamping with distress ink (vintage photo, wild honey and walnut stain) using the smaller maple leaf...


Then to create some more defined features I used the Mandala 5 stencil with burnt sienna acrylic paint and added a few extra dots using a gold paint pen and some white paint splatters across both pages...


I wanted to lighten up the spread a little so decided to add the regular dots d'inkable with white paint to areas of the pages...


For my main focal points I stamped images from both the regular and XL Doodle Mushrooms sets onto watercolour card and after cutting them out coloured them in using watercolour paints.  After sticking them down I added some shading with a brown pitt pen around the edges of the images to provide more shadow.  Finally I stamped out the same sentiment used earlier and added some colour to match the rest of the spread...


To create my project I used the following products available from the Bee Crafty website:

Doodle Art Stamps - Mushrooms (regular)
Doodle Art Stamps - Mushrooms (XL)
Beautanicals - Maple Leaf
Inkables - Mandala 5
* D'Inkables - Regular Dots
Distress Ink Pads

Thank you for looking and happy crafting!

Jane xx

Saturday 12 October 2019

'Butterfly Rainbow Card' for Bee Crafty

Hello!

Today on the Buzzy Goings on at Bee Crafty blog I thought I would create a really quick card with minimal layers!  This is especially unusual for me but today I wanted to let the stamp speak for itself...


* The piece of white stamping card was cut to 4 and a quarter by 4 and 3 quarter inches in size
* I used the regular doodle butterfly, stamping with black Versafine and then using clear embossing powder over the top which I heated
* Next I used Faber Castel Pitt Pens to colour the butterflies, blending the different tones and trying to use all the colours of the rainbow.  I then added a little bit of doodling with a white Posca pen
* Choosing a sentiment from the Everyday Sentiments 2 set, I stamped onto black card using Versamark and embossed with white powder
* The sentiment was added using foam pads then the whole piece matted onto black card then onto a card base

Here are the links to the products used:

Doodle Art - Butterfly #1 (regular)
Wordage - Everyday Sentiments 2 

I hope that my card has helped to show you the fabulous quality and stamp design that Bee Crafty provide.

Thank you for looking and happy crafting!

Jane xx

Wednesday 9 October 2019

'Circles' for Tando Creative

Hello!

This week the theme on the Tando Creative blog is circles, my favourite shape!!


I started by looking through my Tando Creative greyboard and selected some different sizes of circles as well as two of the steampunk parts semi circles.

Using the rings stencil I added modelling paste to the plain pieces and once this was dry stapled the semi circles together and painted all the pieces with black gesso...


Next I sprayed them with a metallic ink and then added some silver gilding wax.  Once this was done I stuck the pieces altogether.  At this point I wanted to add a splash of colour so chose some paper flowers that had circular centres.  To add some extra details I also selected a few clear circular flat backed pebbles...


Finally I chose a sentiment and added some black thin wire to hang it up with.

These are the products I used:

Tando Creative - Steampunk Parts
Andy Skinner Industrial Elements - Bolts and Washers
Tando Creative Stencils - Rings
Decoart Mediums

Thank you for looking and happy crafting!

Jane xx

Saturday 5 October 2019

'Mushroom and Ladybird Doodle Art Samples' for Bee Crafty

Hello!

Today on the Buzzy Goings on at Bee Crafty blog I am sharing the samples that I made for this weeks HOCHANDA shows using the new Mushroom and Ladybird Doodle Art stamps...


Bev and Sam did some great demonstrations using the new stamp sets!  The shows were on Monday 30th September at 10am and 2pm and should still be available on rewind on the HOCHANDA website. 

Thank you for looking and happy crafting!

Jane xx