Saturday 30 June 2018

The Pink Rats! For Bee Crafty

Hello!

Today on the Buzzy Goings on at Bee Crafty blog I am sharing some more ATC's that I have made to add to my Bee Crafty collection.  This time I wanted to create a couple more using the Inspired by Banksy stamps and went for a rat theme!  I also decided to go for a colour scheme that I don't automatically use...


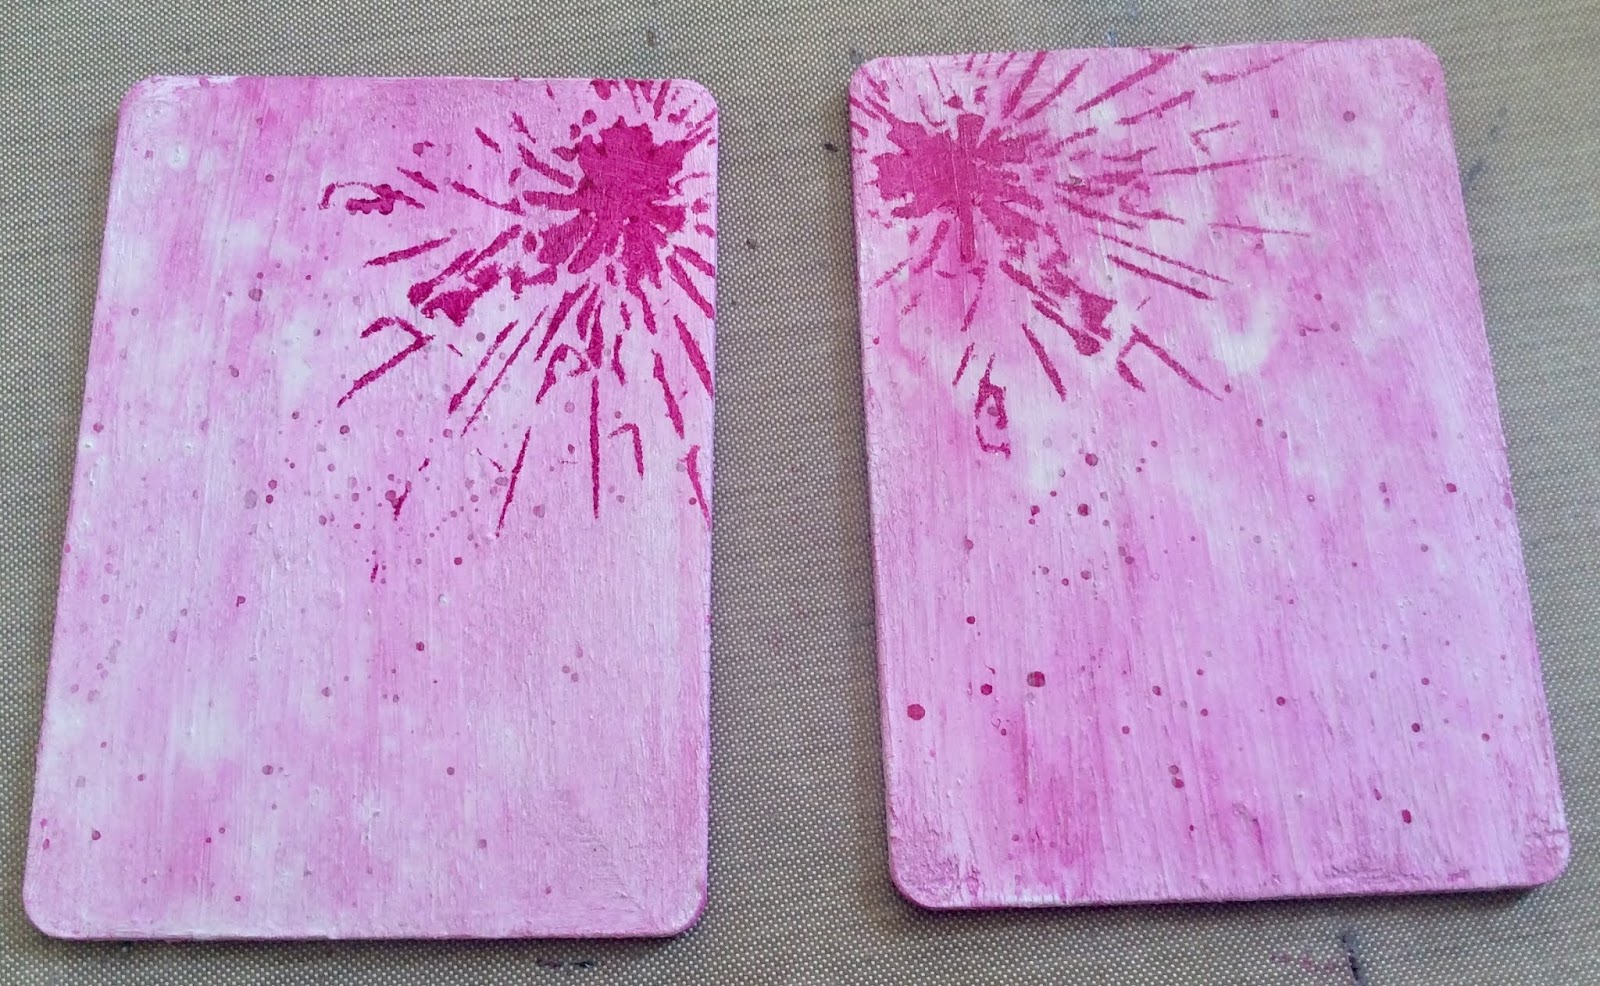
To start I coated 2 grey board ATC's with white gesso then watered down some magenta acrylic paint and coated the boards, also allowing some of the colour to drip down.  I then added some splashes of the same colour as well...


The next stage didn't work out as I wanted but I still liked the effect so went with it!  I placed the chain link d'inkable over the top of the ATC's and sprayed white acrylic ink over the top.  I sprayed too much ink which meant that the pattern wasn't defined and when I do it another time I will try to be much less heavy handed...


However I still liked the colour that this had created so carried on by adding some of the original magenta through the cracked glass d'inkable...


For my next layer I used the texture border and circle stamps with archival inks...


To make the focal images really stand out against the background I used black archival ink with the Ghetto Rat and Ratzzi stamps...


I still wanted a bit of extra dimensional texture so used crackle paste through the regular dots d'inkable...


Whilst this was drying I stamped 2 of the Everyday 1 Sentiments onto white card, cut them out and inked around the edges with some pink distress ink.  After a few splashes of watered down black acrylic paint had also been added the sentiments were glued on.

Here are the ATC's with the others I have made using the Banksy range.  You can read about the other 2 HERE...


To create my ATC's I used the following products...

* Inspired by Banksy - Ghetto Rat
* Inspired by Banksy - Ratzzi
* Backdrop Borders - Texture Borders
* Backdrops - Texture Circles
* Wordage - Everyday Sentiments 1
* D'Inkables - Chain Link; Cracked Glass; Regular Dots
* Archival Inkpads

Thank you for looking and it would be lovely to see your creations over on the Bee Crafty Facebook group too!

Happy crafting,

Jane xx

Monday 25 June 2018

Spray Ink Heart for Tando Creative

Hello!

This week the design team are using spray inks or paints with their projects on the Tando Creative blog and I decided to use some inks with one of the lovely shadow frames...


I started by preparing all the frame pieces with white gesso then added some stencilling using the mini cog stencil.  When this was totally dry I stuck them together and added some of the mini grey board cogs, tucking them under some areas where the frame was raised.  More white gesso was then added to make sure that the surfaces were all ready for the spray ink...


I have quite a selection of different types of sprays but decided to use a matt red acrylic ink spray to provide my main colour.  I dried with my heat tool between layers and then added another type of spray that contained mica for a bit of sparkle.  When these layers had all been dried off properly I added gold gilding wax to bring out the texture...


Next I added some stamping with black archival ink and the numbers from the Andy Skinner Unexplained stamp set.  From the Steampunk set I stamped the winged key and cut it out, also cutting out the words separately. I sprayed out a little bit of the mica ink onto my glass mat and used this to colour the pieces before adding them to the frame.  To finish I used the black spray from Decoart to add a bit of extra contrast...


Here are the products used...

* Shadow Frames
* Mini Cogs
* Mini Cogs Stencil
* Andy Skinner - Unexplained Stamp Set
* Andy Skinner - Steampunk Stamp Set
* Decoart - Black Media Mister

These frames are lovely to work with and all the pieces took the sprays really well.
Thank you for looking and happy crafting!

Jane xx

Saturday 23 June 2018

Under The Sea for Bee Crafty

Hello!

Last week Sam brought the fab new Under the Sea stamps to HOCHANDA so today on the Buzzy Goings on at Bee Crafty blog I am sharing some of the samples that I made.  Each is very different in the style and techniques used but they all use the stamps and MDF that Bee Crafty create.

The first one is using the largest of circle art boards...


I used the circle and feather d'inkables to create some under the sea details with texture paste.  Sand paste was used along with art balls at the bottom part to create a sea bed impression.  Spray inks provided the colour then gilding wax to enhance the texture.  The regular sized seahorse was stamped onto heat resistant acetate and embossed with gold powder, then I used a gold paint pen to colour in on the back.  Seaweed was stamped, coloured and cut out to add to the bottom and the bubble stamp used on the board.  The words are from the Creativity Words set and the finishing touch was to add some beads to the sea bed.

The second board is one of the free standing tag shaped art boards...


I wanted to use the seahorse again but this time straight onto a board and with a very different coloured background.  As I wanted bright colours I used Dylusions paints and then added detail with some of the d'inkables in the same colours.  The seahorse and bubbles were stamped directly on with black ink and then the word stamped onto card and added with a hint of distress ink on the edges.

Last but not least I also created a tag that isn't free standing, I added my own holes using a crop a dile...


As soon as I saw the octopod I wanted to create an industrial/steampunk type look with him.  The  tag was prepared using the metal alpha d'inkable, texture paste and also some sand paste for a rusty texture.  I created the colour using a pitted metal/rust technique that Andy Skinner teaches and then used my paints to add more rust and patina effects around the edges.  The octopod was stamped onto heat resistant acetate and then coloured on the back with alcohol markers.  I stamped out the eye for a second time onto card before cutting out and colouring.  Some glossy accents were added to make the eye shiny as well.  Finishing touches were some sea weed and the words and rusty wire for a hanger.

Here are some links to the products used...

* MDF
* Art Stamps - Seahorse Set Regular
* Art Stamps - Octopod Set XL
* Wordage - Creativity Words Large
* D'inkables
* Dylusions Paints

Thank you for looking and happy crafting,

Jane xx

Saturday 16 June 2018

Positive Butterflies for Bee Crafty

Hello!

Today over on the Buzzy Goings on at Bee Crafty blog I have created an art journal page...


To read more about how it was created and see more pictures you can visit the blog HERE.

Happy crafting,

Jane xx

Wednesday 13 June 2018

Shining Heart for Tando Creative

Hello!

For anything goes week on the Tando Creative blog I have decorated one of the media boards using a selection of hearts and mini cogs...


After applying white gesso to prepare the surfaces I used the mini cogs stencil with some texture paste to add some detail to the main board.  I then used a selection of metallic paints to colour all the pieces...


To make sure the pieces stood out I used some black archival ink around the edges and then used the same ink to stamp some of the Andy Skinner Steampunk images onto the shapes.  After adhering all the parts I finished off the project with some Tim Holtz small talk stickers...


Here are the links to the products used...

* Media Boards
* Mini Hearts
* Mini Cogs
* Andy Skinner Steampunk Stamp Set

Thank you for looking and happy crafting!

Jane xx


Saturday 9 June 2018

Dream Catcher for Bee Crafty

Hello!

For my project today on the Buzzy Goings on at Bee Crafty blog I thought I would share another bit of art journaling.

I recently acquired a couple of the gorgeous new mandala stencils and I thought that they would look great as a dream catcher...


I started by preparing a watercolour page in my largest mixed media journal with gesso then used my brayer to add layers of Dylusions paints.  I used vibrant turquoise, fresh lime, lemon zest and bubblegum pink, and made sure that each layer was dry before adding the next.  Then I used stencils to add extra texture using the same colours plus some white gesso (perspective, honeycomb 3 and oval lace)...


Next layer was the stamping with the texture borders and texture circles.  These were used with archival ink which is ideal for adding over paint.  I also used a bit of paint in the centre of the circles to create a more solid feel.

To add extra dimension I used gold sparkle texture paste through the mandala 4 stencil.  Once I had completed this the mandala which was to be the dream catcher did not stand out enough for me, so I re-stencilled it onto some white card.  When that was dry I cut out the shape and added archival black ink around the edges and across some parts of the design.  I also added a punched circle to the centre with a gem for extra decoration...


After this the quill feather was stamped three times and cut out.  These were coloured with some slightly watered down Dylusions paint to match the background.  Once they were put into place I used one of the style wire borders to make extra fronds and also the hanging string...


To tie the page together I added extra black archival ink around the edges of the page to create a frame and then also to some of the sparkle paste to create a slightly more grungy feel.  Splatters of both watered down black and gold paint were also added across the page.

Finally I chose a sentiment that matched the theme which was stamped and cut into pieces before being inked and added to the final project...


To create this page I used the following products...

* Inkables - Mandala 4, Perspective, Honeycomb 3, Oval Lace
* Art Stamps - Quill Feather
Backdrop Borders - Texture Borders
Backdrop Stamps - Texture Circles
* Backdrop Borders - Style Wire Borders
* Wordage - Wake Wonderful
* Dylusions Paints
* Archival Inkpads

I hope you have enjoyed my interpretation of the mandala today!
Thank you for reading and happy crafting,

Jane xx

Friday 1 June 2018

Creative Artiste: 'Reel' Butterfly Tower

Hello!


The first Friday of June means that it is the start of a new challenge over on the Creative Artiste challenge blog!  Thank you for all the great entries last month and if you go over to the challenge page there is a post telling you all about the winner, click HERE for the link over.

This month our prize sponsor is Decoart!

 
For my design team project I have used a number of their great mixed media products to help create this floral tower...
 
 
Having finished some reels of wire and ribbon recently I really didn't want to throw those reels away, so I decided to use lots of my mixed media mediums to help alter them into a tower!
 
I started by attaching them (plus the dowel) together with heavy body gel, then coated the majority of the project with texture sand paste.  This was then left to dry completely overnight to make sure it was really sturdy...


Next I added crackle paste and art balls for even more texture...
 
 
Once this was also totally dry I added colour using spray inks from Lindy's Gang, then once I was happy with the colour I used gold gilding wax to bring out the texture...


To add decoration I looked through my crafty stash and chose paper flowers, sequins and gems that matched the colour scheme.  These were all adhered using glue gel...


Finally I wanted a butterfly to go on the top of my tower, so I stamped the large butterfly from Bee Crafty using gold embossing powder and coloured it in with marker pens.  Some gems were added to the body for a bit of extra sparkle.

Thank you for taking the time to have a look at my project.  I hope it has inspired you to enter the challenge this month, the theme is always anything goes as long as it is mixed media.

Happy crafting,

Jane xx

Altered Eclectics: 'You Are Enough' Art Journal Page

Hello!

The first day of June sees a new challenge over on the Altered Eclectics challenge blog.  Thank you to all those who entered last month, it is inspiring to see the range of altered art and mixed media that you all create.  If you would like to see the design team projects plus check out the rules for entering please click HERE.  The challenge is always anything goes, but no cards or ATC's please.

For this month I created a journal page in my extra large mixed media journal from Dina Wakely...


The background was created using a range of Dina's acrylic paints and then extra details added using some of her stencils and background stamps...


The stars, girl and sentiments were all stamped from more of Dina's stamp sets then the pieces cut out and coloured using her scribble sticks (water soluble pigment sticks)...


Finally some doodling was added using white and black posca pens and to add a bit of extra texture I stencilled some gold sparkle paste through a stars d'inkable by Bee Crafty...


Thank you for looking and I would love to see lots of your art over on the challenge blog this month.

Happy crafting!

Jane xx