Wednesday 30 January 2019

Weathered Frames Tag for Tando Creative

Hello!

This week on the Tando Creative blog the theme is 'Frames'.

I was inspired to use one of the technique tags that Di brought to HOCHANDA yesterday as my base, but wanted to use a range of other greyboard pieces from my stash as the frames.  What I added to my tag are some of the mini frames and also washers and other pieces that have a frame like appearance...


I started by putting my pieces together, sticking the frames where I wanted them.  Then once these were set I added texture using Decoart Texture Sand paste to which I added art balls and micro beads to create different sizes of grains...


After this I also added some of the Decoart crackle paste and then once all of these were dried I painted over with white crackle paint as this added a much finer type of crackle. 

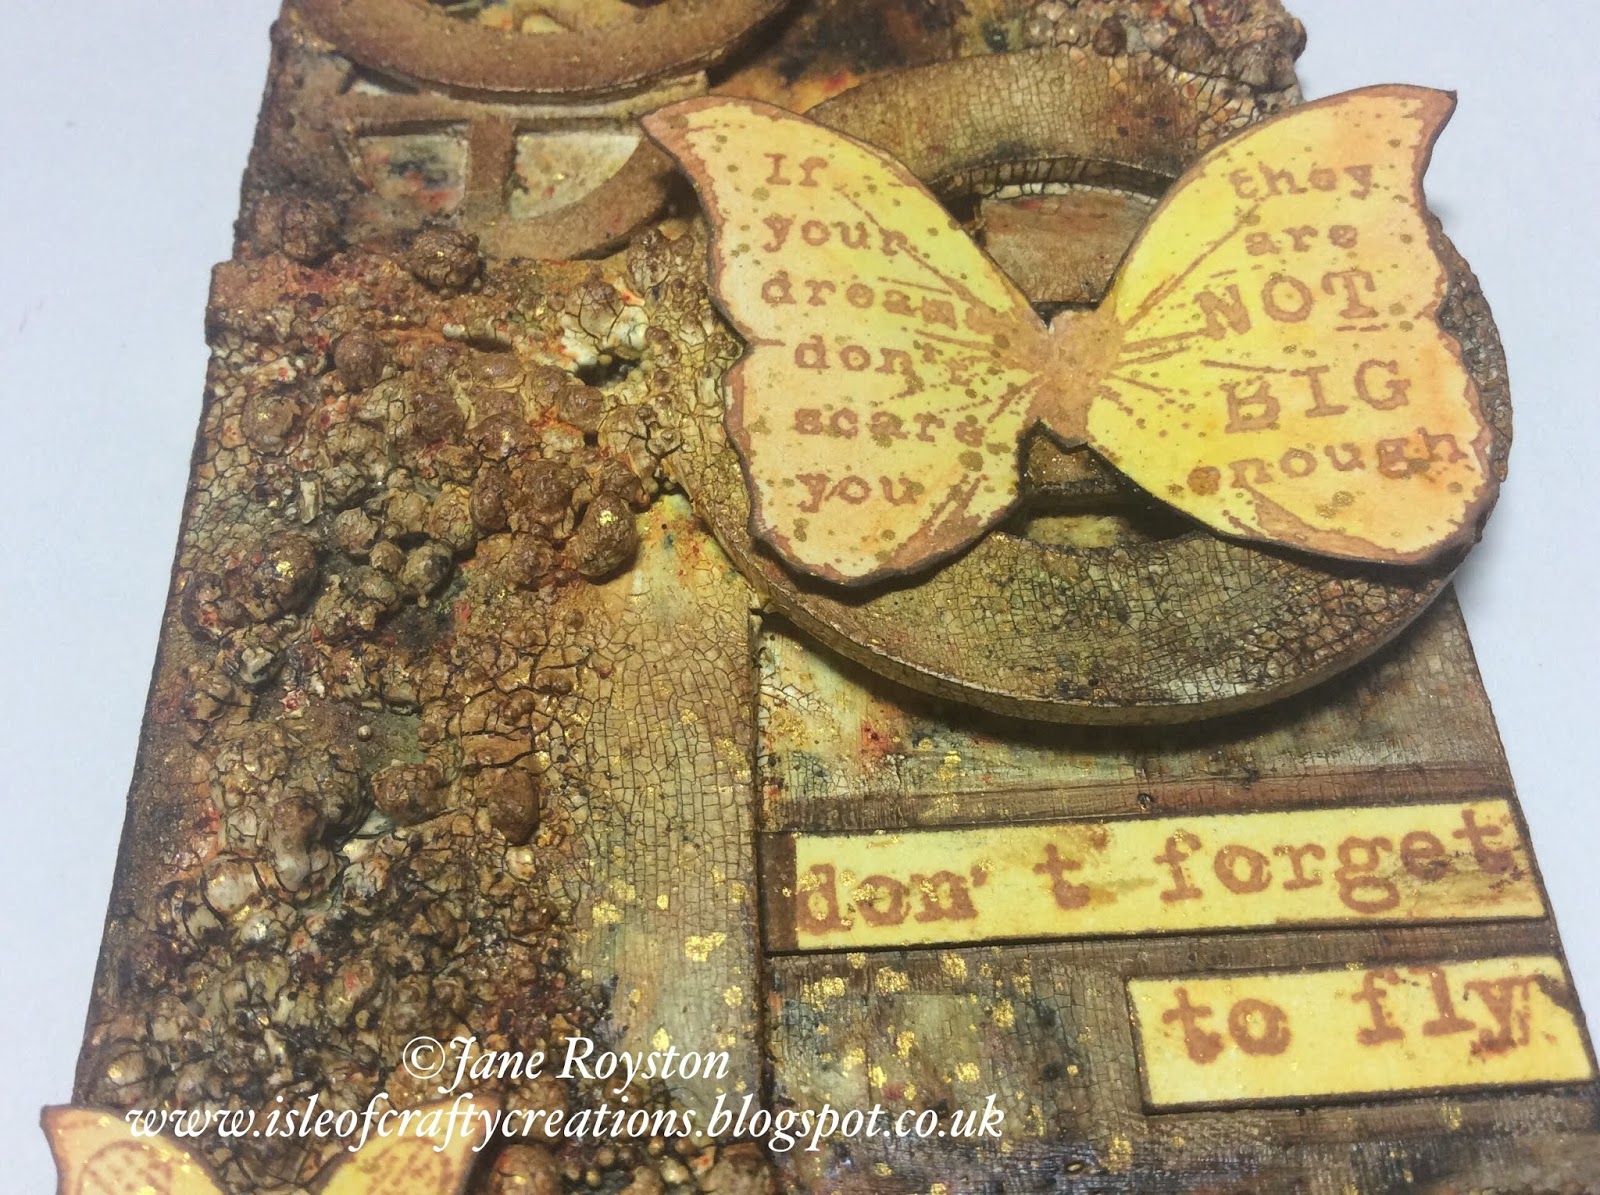
To create the colour I decided to use Brusho powders as I wanted all the crackle to be able to show.  I sprinkled a selection of yellow, gamboge and brown powders then spritzed with water.  These were then added again in different amounts, gradually building up the layers of colour until I was happy with the final effect...


Next I stamped out the butterflies and sentiment from a Finnabair set and coloured with some distress ink.  To create more definition to some of the edges I used an archival inkpad and sponge to make them a bit darker.  Finally the pieces were added to the tag, using some of the circles as frames for the butterflies...


Here are the products that I used to create my tag:

* Tando Creative Tag
* Tando Creative Mini Frames
* Tando Creative Industrial Elements
* Decoart - Texture Sand Paste; Crackle Paste; Crackle Paint
* Brusho Powders

Thank you for looking and happy crafting!

Jane xx

Saturday 26 January 2019

HOCHANDA Samples for Bee Crafty

Hello!

Today on the Buzzy Goings on at Bee Crafty blog I am sharing the projects I made for this weeks HOCHANDA shows...


If you didn't catch Sam and Bev's demos then they will still be available on the HOCHANDA website on rewind for a couple of weeks.

Happy crafting,

Jane xx

Saturday 19 January 2019

'Light Tomorrow' Canvas for Bee Crafty

Hello!

For my project today on the Buzzy Goings on at Bee Crafty blog I am using some of the same stamps that I used for my art journal last week but this time have gone for a more textured and grungy feel...


I used a 12" x 12" canvas board to fit inside my box frame then adhered an 8" x 8" chipboard panel on top of it.  This was because I wanted to create a very textured border and have my main images in the centre panel with a patterned background.

I started by adding some texture sand paste to two of the outside corners then put into this some art balls and micro beads to create different sizes of 'grains'.  When dry this was painted over with white gesso.
Next I added some areas of white modelling paste which I pushed my mini distressed diamond stamp into.  However because the paste was either too wet or too thick it didn't leave a clear impression but did create some nice texture.
The final type of texture I added was some crackle paste which I added through the distressed harlequin d'inkable plus some extra paste added in other areas with a palette knife....

Once this was all thoroughly dry and white gesso had also been used to cover the centre panel I added brusho powders to colour the whole surface. 
I started with yellow, then sprinkled gamboge and brown.  I also added some turquoise for a bit of contrast. 
Where it was needed I spritzed on extra water and dried in between the layers, continuing to add more colour until I was happy with the look. 
To help the texture stand out I then used two tones of gold gilding wax over the different surfaces...


To decorate the centre panel I used a selection of stamps with archival ink to create extra interest and then repeated the use of the harlequin d'inkable with some gold paint.
After choosing some of the MDF cogs and a clock for dimension, these were painted with gesso then brushos added.
As I wanted my main images to match the rest of the project I used the same brusho powders to colour some card. 
Then I stamped the light bulbs and the sentiment with brown Versafine which I embossed with clear powder.
Once all of the elements had been cut out I used some rusty wire to attach to the MDF cogs for the smallest bulbs to hang from (I also added in an extra metal cog from my stash). 
Everything was then adhered using glue gel...


Finally I painted my frame with black gesso then added gold gilding wax to create a vintage feel before adding in the canvas.

These are the products that I used:

* Art Stamps - XL Light Bulb Circuit
* Art Stamps - Light Tomorrow
* Backdrops - Multi Mini Distressed Diamonds
* Backdrops - XL Script
* D'Inkable - Distressed Harlequin
* MDF - Cogs
* MDF - Clocks

I really enjoy finding different ways to use the same stamps as it really makes the most of them!  I hope you will get some of your Bee Crafty stamps out this week.  If you make anything do please show us in the Bee Crafty Stamps group on Face Book :)

Thank you for looking and happy crafting.

Jane xx

Thursday 17 January 2019

Altered Tin for Butterfly Squad Creative Team

Hello!

Today I have a step by step photo tutorial over on France Papillon's blog showing how I used stamps and stencils to alter a tin.  The full post can be found here...

www.france-papillon.com/single-post/2019/01/17/Butterfly-Squad-creative-team-inspiration-Jane

Here is a sneak peek of the finished project...


Happy crafting,

Jane xx

Saturday 12 January 2019

'Light Up' Art Journal Spread for Bee Crafty

Hello!

I thought it was about time to use my Bee Crafty stamps and stencils to do a bit of art journaling this week...


I started by choosing 3 complementary colours of acrylic paint and applied it to my pages using my fingers.  I wanted to focus on two main areas to create a flow across the pages so applied my paint but left some empty space...


To tone the colours down slightly and also help them look more blended I used my brayer with some buff coloured paint...


Next I chose my 3 favourite d'inkables (metal alpha, chevrons and circles).  For the first two I chose a contrasting colour to my background and added them to the areas that had colour, travelling mostly in a diagonal direction across the page.  Again to help tone the colours together I used buff with the circles when I stencilled them...


At this point I debated whether to leave the background as it was but eventually decided I wanted a little bit of stamping for more texture.  I chose to use parts of the Light Bulb Circuit XL stamp with sepia archival ink.  Then to frame the page I added some of the same ink to the edges where the paint ended...


I wanted to create a collage effect with my stamps that would be focal points on either side of the pages.  Using a selection, I stamped out some images and cut them out.  Once I had an idea of what I wanted to create I coloured them using distress crayons and pens, then decided to use glossy accents to enhance them...


Finally I mounted them up onto the pages with glue gel and then added a sentiment...


To create this project I used:

* Art Stamps - Large Butterfly
* Art Stamps - Dragonfly and Butterfly
* Art Stamps - XL Light bulb Circuit
* Art Stamps - Light Tomorrow
* Art Stamps - Texture, Film Strip and Circles
* Backdrop Frames - Style Wire Hearts
* Backdrop Frames - Style Wire Square (large)
* D'Inkables - Metal Alpha, Chevrons and Circles

Thank you for looking and happy crafting,

Jane xx

Thursday 10 January 2019

HOCHANDA Stencil Week for Tando Creative

Hello!

Today on the Tando Creative blog I am sharing the stencil covers that I made using the new long stencils that Di brought to HOCHANDA back in December...


To decorate the covers I used two of the new stencils, Keep Out and Barbed Wire. 
To create the rusty effect I used Decoart texture sand paste through the stencils plus extra paste around the edges. 
Once this had dried I painted them with silver fluid acrylic then used a range of yellow, brown and quinacridone gold to make the rust colour.
Finally I added a bit more barbed wire with a stamp by Andy Skinner and archival ink.

Here are the links to all the products used:

* Stencil Covers
* Barbed Wire Stencil
* Keep Out Stencil
* Andy Skinner Stamp Set - Handle With Care
* Decoart - Texture Sand Paste
* Decoart - Fluid Acrylic Paint

Thank you for looking and happy crafting,

Jane xx

Saturday 5 January 2019

Courageous Lion Card for Bee Crafty

Hello!

Happy new year!
 
I have decided to share a card with you today on the Buzzy Goings on at Bee Crafty blog that has a sentiment I think we all as crafters need to follow sometimes...


To start this project I began by stamping the lion image from The Wizard of Oz collection using sepia Versafine then embossed with clear powder as I hadn't yet decided which colouring mediums I wanted to use!
I ended up using my watercolour paints and then Faber Castell pitt pens to colour the image and added some white highlights with a signo uniball pen. 
To give the image extra dimension I coated it using glossy accents, then when that layer had dried added another (to be honest I did this because I had stuck my finger into the first layer in my impatience!!).  You can see the high shine this had in the photos as I could not avoid the light showing in them...


Next I stamped and cut out the sentiment then started on my background. 
I cut a piece of card measuring 4 3/4" x 6 3/4" as it was going to go on a 5 x 7 card blank.  I wanted to create a vintage looking background so used my distress inks (tea dye, vintage photo and walnut stain). 
I used each colour one at a time by putting some onto my craft mat, spritzing with water and then adding to the card.  The colours were used from light to dark and when I wanted a more dappled look I dabbed the card rather than put it all in...


After I had added the colours it felt a bit too dark so I splashed some water onto the card then dabbed off with kitchen towel, one of the great properties of distress inks. 
I still wanted some extra lighter elements so used the circles d'inkable to remove some of the colour by faux bleaching with a damp cloth, then drew around the circles with my white pen. 
To make the circles a bit different I added some scribbles around the edges then decided to do the same with a border around the whole piece of card.  
I wanted the circles to be lighter still so added some white distress crayon to them as well. 
To create some extra texture I used my favourite ever Bee Crafty stamp the Script XL with some of the distress inks in random areas.

To frame the main piece and sentiment I blended some walnut stain around the edges. 
The background was then stuck flat to the card but to create dimension I added the sentiment with foam tape and the lion with glue gel.

Here are the items that I used:

* Wizard of Oz - Cowardly Lion
* Wizard of Oz - Inspirational Sentiments
* Backdrops - XL Script
* D'Inkables - Circles
* Distress Ink Pads

Thank you for looking and I hope that this year we will all have both courage and self confidence within our crafting.

Happy crafting,

Jane xx