Saturday 29 December 2018

New Year Notebook for Bee Crafty

Hello!

I hope you all had the Christmas you wished for and are now looking forward to the new year. 

I thought that as it is almost the start of 2019 I would create a project to mark that new beginning. 
I am not one for resolutions as I believe that you can achieve new things at any time of the year, but I do like inspirational quotes so thought I would make a notebook to put them into...


Once I had cut the mount board pieces using a die to create the main book and mini book, I used acrylic paint to coat them all.  I wanted to use a stamp in a different way and decided on the spikey snowflakes as when they were embossed in gold onto the teal I felt that they looked like mystical suns!...


When the notebook had been assembled I wanted to create more of a focal point, so stamped some of the snowflakes again onto a piece of card that I painted and then die cut them into circles.  I wanted to use the same wording on both the main book and the mini book charm so chose a sentiment set where there were two sizes of fonts (Inspirational Words 1)...


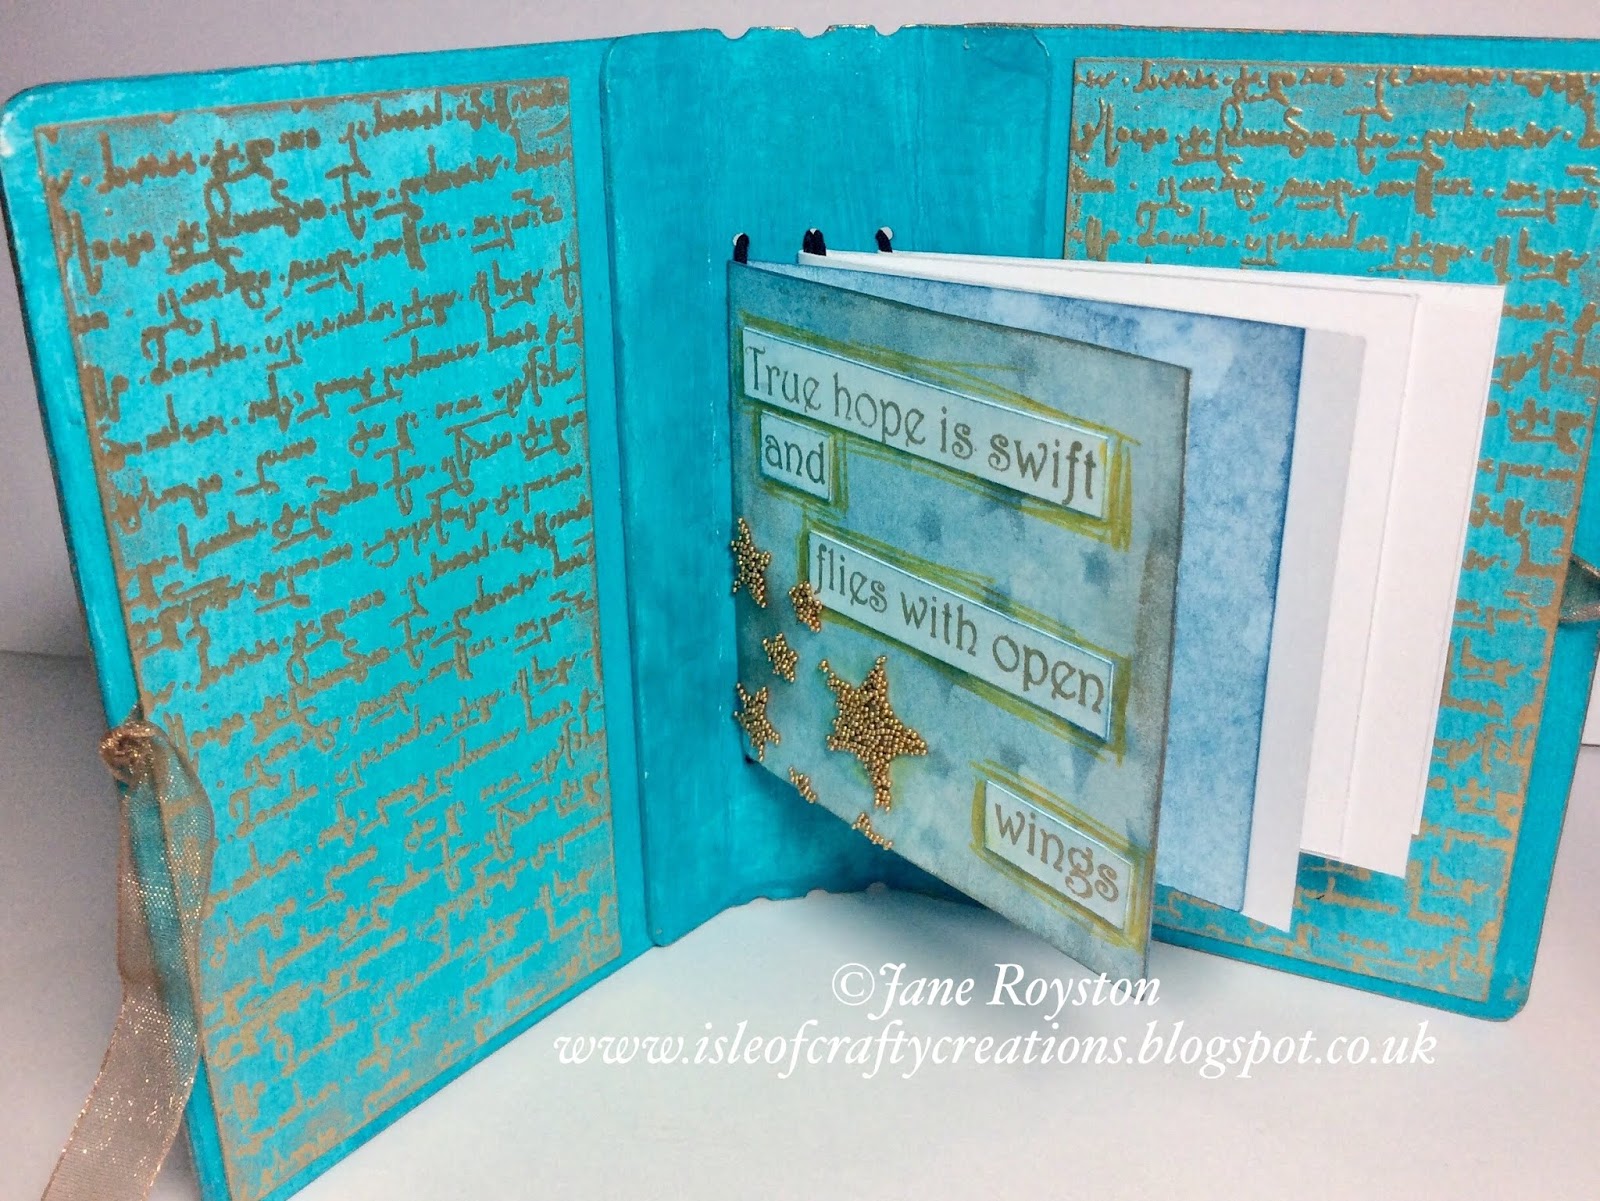
To add my ribbon closures I used red liner tape to attach them inside the covers then used the script stamp to make some pretty inserts which were placed over the top.  I added some pages under the elastic and started off my notebook with one of my favourite Bee Crafty wordage stamps...


My aim is now to add quotes to the book throughout the year so that by the end it is a book of inspiration!

Here are the products used:

* Yuletide - Spikey Snowflakes
* Backdrops - Script XL
* Wordage - Inspirational Words 1
* Wordage - True Hope
* D'Inkables - Stars

I hope you have a wonderful start to the new year, happy crafting!

Jane xx

Saturday 22 December 2018

Vintage Christmas Wishes for Bee Crafty

Hello!

As it is my last Saturday post on the Buzzy Goings on at Bee Crafty blog before the big day I would like to take this opportunity to wish you all a merry Christmas whatever you will be doing and hope that it brings you all that you wish for.

Because it is now so close I thought that I would share with you a Christmas project but instead of the usual traditional colours I decided to go a bit vintage and used some stamps that you would not really class as Christmassy...


I started with one of the MDF tags which I painted with white gesso then used versamark ink and ultra thick embossing powder to coat the tag.  I did this 3 times to create a really thick layer then covered the script stamp with brown staz on and stamped it into the molten powder.  I left it there until the powder had started to cool and then removed the stamp.  The impression was uneven in places and not all of the ink had gone on but this helped to add to the vintage feel...


Next I used versamark and a fine gold embossing powder to stamp and heat emboss the wings, small heart and sentiment stamps.  I used some antique linen and vintage photo distress crayons to colour the images and then adhered them all to the tag...


To finish off the pieces I used a gold pen around the edges of the stamped images and gold gilding wax on the tag.

Here are the items that I used:

* Backdrop Stamps - Script XL
* Art Stamps - Feather Wings
* Backdrop Frames - Style Wire Hearts
* Yuletide - Everyday Christmas 1
* MDF - Victorian Tag

Thank you for looking and happy crafting!

Jane xx

Saturday 15 December 2018

HOCHANDA Samples for Bee Crafty

Hello!

Today on the Buzzy Goings on at Bee Crafty blog I am sharing the samples that I made for the shows last week using the fab new stamps...


MDF Tag board using some of the MDF embellishments and light bulb stamp.


Diorama card using the large bulb circuit background plus the smaller bulb stamp.  Monochrome effect using white embossing powder onto black card.


Shaker card using the smaller light bulb stamped onto acetate and then raised up.  Glitter inside and distress oxides used for the colour.


MDF light bulb plus MDF Da Vinci wings to create a dragon!


Easel card using the compass tracks stamps in the background.  The film reel was created by repeat stamping the film then cutting out the centre parts and adding acetate behind.


Tent card using distress inks to create the colour then stamping using lots of the different texture stamps.  The compass was stamped from the large background then cut out for a focal point.

To create my samples I used:

* Art Stamps - Light Tomorrow
* Art Stamps - XL Compass Tracks
* Art Stamps - XL Light Bulb Circuit
* Art Stamps - Texture Film Strip and Circles
* Wordage - Boy Girl Work
* Distress Ink Oxides
* MDF Tag Board

Thank you for looking and happy crafting!

Jane xx

Wednesday 12 December 2018

Countdown to Christmas ATC's for Tando Creative

Hello!

As we are now well into December and on our way towards Christmas I was inspired to make a couple of seasonal ATC's...

 
I started by coating the Tando Creative grey board ATC cards with white gesso then once that was dry added a coat of white crackle paint.
I allowed the crackles to dry naturally then used washes of pyrole red and green gold acrylic paint to create the colour...
 
 
Using the mini parcels and bows from Tando I painted them with the same two colours plus metallic gold.  I edged the presents with gold gilding wax (and the edges of the ATC's) before layering them up and drawing on ribbons with gold gel pen.
To create some extra interest in the background, I stencilled gold paint through the mini numbers stencil...


Finally I stamped and gold embossed the sentiments onto white card and added some gems to the centre of the bows.
 
Here are the products that I used:
 
 
Thank you for looking and happy crafting!
 
Jane xx


Saturday 8 December 2018

Snowflake ATC's for Bee Crafty

Hello!

Today on the Buzzy Goings on at Bee Crafty Blog  I am sharing some wintry ATC's...


I started by coating both of the pieces with white gesso then sprinkled on some brusho powders (turquoise and ultramarine), activating them with water...


Next I stamped snowflakes using archival inkpads in coordinating colours...


Finally I used the snowflake d'inkable with some clear texture paste which I then sprinkles with iridescent glitter.  Once this had dried I stamped the sentiments from the Everyday Christmas 1 onto white card and mounted them on the ATC's with foam pads.
 
Here are the products that I used:
 
 
Thank you for looking and happy crafting!
 
Jane xx


Friday 7 December 2018

Creative Artiste: Snowflake Girl Tag

 
Hello!
 
Today is the start of a new challenge over at the Creative Artiste Mixed Media Challenge...
 
 
If you go over to the challenge you can find out who our winners were for last month and also about this months sponsor - Paperbabe Stamps...
 
 
As it is now December I decided to make a tag with an icy feel...


The background of the tag was created with texture paste through a snowflake stencil and then white crackle paint.  This was coloured using washes of acrylic paint...


The main snow girl was created using stamps from Bee Crafty which were cut out and coloured before adding liquid pearls and glitter pen...


For some extra dimension at the bottom I coloured some chip board and MDF snowflakes before adding gems to the centres.  The final touch was a sentiment from Tim Holtz's stickers...


Please do pop over to the challenge blog where there is also information about a design team call!
It would be great to see your entries this month, happy crafting!
 
Jane xx


Saturday 1 December 2018

Cogs and Feathers MDF Tag for Bee Crafty

Hello!

After sharing quite a clean and simple card last week on the Buzzy Goings on at Bee Crafty blog, I decided to go all out texture and layers this week!
To do this I have decorated one of the MDF tags using lots of mixed media products...


To start I wanted to create some texture on the base so used the Perspective Circles Inkable with a light texture paste, then I added touches of sand paste onto the corners and edges for extra grunge!  Whilst this dried I chose 3 of the MDF cogs that I thought would fit nicely.  I had positioned different versions onto the tag earlier to help me choose which combination I liked best.  These were each coated with white gesso and some more of the sand texture paste added...


Once the pastes were thoroughly dry I painted the tag with white gesso then added white crackle paint to both the tag and the cogs.  These were then stuck into place on the tag using a strong white glue...


Next I wanted to add some colour.  I chose two acrylic paints, but to create more of a wash effect I put some of the paint on my mat and added water.  I also added water to the paint as I dripped it down the tag when I wanted it to be more translucent...


To add a metallic contrast I used silver gilding wax across the textured areas and then added silver micro beads with a heavy gel...


To complete the tag I stamped some small cogs and a selection of small feathers onto old book paper using archival grey ink.  The final touches were to then add a sentiment and some ribbon plus a few extra beads...


To make this tag I used the following products...

* MDF Tag (medium)
* MDF Cogs
* Art Stamps - Cogs Set
* Art Stamps - Assorted Small Feathers
* Wordage - Everyday Sentiments 1
* Inkables - Perspective Circles

Thank you for looking and happy crafting!

Jane xx

Altered Eclectics - Wolf Art Journal Spread

Hello!

The first of December means a new challenge over on the Altered Eclectics Challenge Blog. 
This is the last challenge for 2018 and then there will be a break until February.  If you would like to read more about the challenge then click HERE to go on over where you can read the rules and find links to all the design team projects.  The main rule is that the project theme is anything goes, just no cards or ATC's please!

For this month as we are heading towards that wintry time of year I decided to go for a winter themed art journal spread...

 
The background was created using watercolour ink and some distress crayons. 
 
I then used Bee Crafty snowflake stamps with Archival Ink and added sparkle paste through the Bee Crafty snowflake d'inkable for extra dimension and texture.
 
To create the focal image I used the scenic wolf stamp also from Bee Crafty which I stamped onto acetate then added some white gesso to the back to help the image stand out.  This was adhered to the page along with a few die cut snowflakes. 
 
Next I added my sentiment and to finish the spread used some silver liquid pearl drops in areas around the pages.
 
It would be great to see some of your projects over at the challenge this month so do please go and check it out.
 
Thank you for looking and happy crafting!
 
Jane xx