Saturday 27 February 2021

Birds & Butterflies Hochanda Samples

  Hello!

This week I am sharing the samples that were made for the recent Hochanda show...


Thank you for looking and happy crafting!

Jane xx


Saturday 20 February 2021

'You Are Enough' Card

  Hello!

This week I decided to redo an idea that I had used on a journal page to become the main feature on a card.  

Over on the Bee Crafty Facebook page I had used a stapler with some pre cut elements for part of a journal page and I liked the effect so much that I decided to use it again...

1) I started with a piece of distress watercolour card stock which I sprayed with Peacock Feathers distress oxide spray...


2) I made sure this layer was dry before spraying Wild Honey distress oxide spray through the Honeycombe Multi inkable...


3) To create an extra layer I used the distress matte texture paste through the Fernando big inkable.  Even though the distress oxide had been dried they still bled through into the paste which created an effect that I really liked...


4) Next I added small parts of the Script XL using black archival ink...


5) Using the Bee Monarchy stamps and dies I cut out some of the elements along with the film strip stamp.  I used staples to attach the pieces together to form my focal point...


6) This was added to the card with some black thread underneath and then more staples to attach.  To create a frame it was layered onto a piece of black cardstock...


7) Finally I stamped and heat embossed one of the sentiments from Small Words and added all the elements to a card blank...


Here are the products used:


Thank you for looking and happy crafting!

Jane xx


Saturday 13 February 2021

Let Your Dreams Take Flight

  Hello!

This week I am sharing a card with a distress oxide spray background, which create a lovely chalky effect...


I started with a piece of the distress watercolour cardstock measuring 3 and a half inches by 5 and a half inches and sprayed with squeezed lemonade, twisted citron and speckled egg, drying between each layer...


Next I wanted to add some subtle pattern so I used spun sugar spray through the mandala 1 stencil...


For more background interest I stamped elements from the stitch borders and the numbers sets, using both grey and black archival ink...


Finally for my main elements I stamped and die cut the swallow from the birds and butterflies set along with a sentiment from small words and the tape measure from stitch borders...


These were then all added to the finished card...


Here are the products used:


Thank you for looking and happy crafting!

Jane xx


Saturday 6 February 2021

A Card for a Marvellous Day

  Hello!

This week I decided to make a card but went for a DL size which seems to be really popular at the moment...

* I started by using the Botanical Garden big ones inkable with distress ink (worn lipstick, broken china, mustard seed) and a blending brush, onto a piece of white card...

* Then I matted it onto black card and a card blank...


* Next I stamped out 3 of the butterflies from the Birds and Butterflies set 1 using black versafine clair and heat embossed with clear powder over the top.  These were then cut out using the matching dies...


* The butterflies were then added to the front of the card using some foam tape for extra dimension...


* Finally I stamped one of the XL Everyday Sentiments 1 onto black card using clear ink and embossed it in white.  This was then added flat to the space on the card front...


Here are the products used:


Thank you for looking and happy crafting!

Jane xx


Wednesday 3 February 2021

'Be Mine' Valentine's Gift Bag

  Hello!

As we are now in February it is the time of year when we might be considering some romantic makes!

Today I am sharing a Valentine's Gift Bag (although it could be for an anniversary, engagement or other romantic occasion) and there is also a video of the project being made over on the Prickley Pear YouTube channel...

https://youtu.be/hnNEE-_lPDs


* I started by using a pre made white gift bag from my crafty stash and flicked sparkle pen ink in red and gold across it.

* Next I took a piece of black card and stamped with the Wow! clear embossing ink one of the elements from the banner set and then embossed with a gold glitter powder.

* Then I stamped out images from the banner set, including heat embossing the largest onto black, and then cut them out using the banner dies.


* I also stamped and cut out one of the love themed cupcakes using the stamp and die sets that match.

* These were all then coloured using the same sparkle pens from the start of the project and then some red distress ink added around the edges with a blending brush.

* Finally they were all adhered with some glue gel.


The products used can be found on the Prickley Pear website: https://www.prickleypear.com/

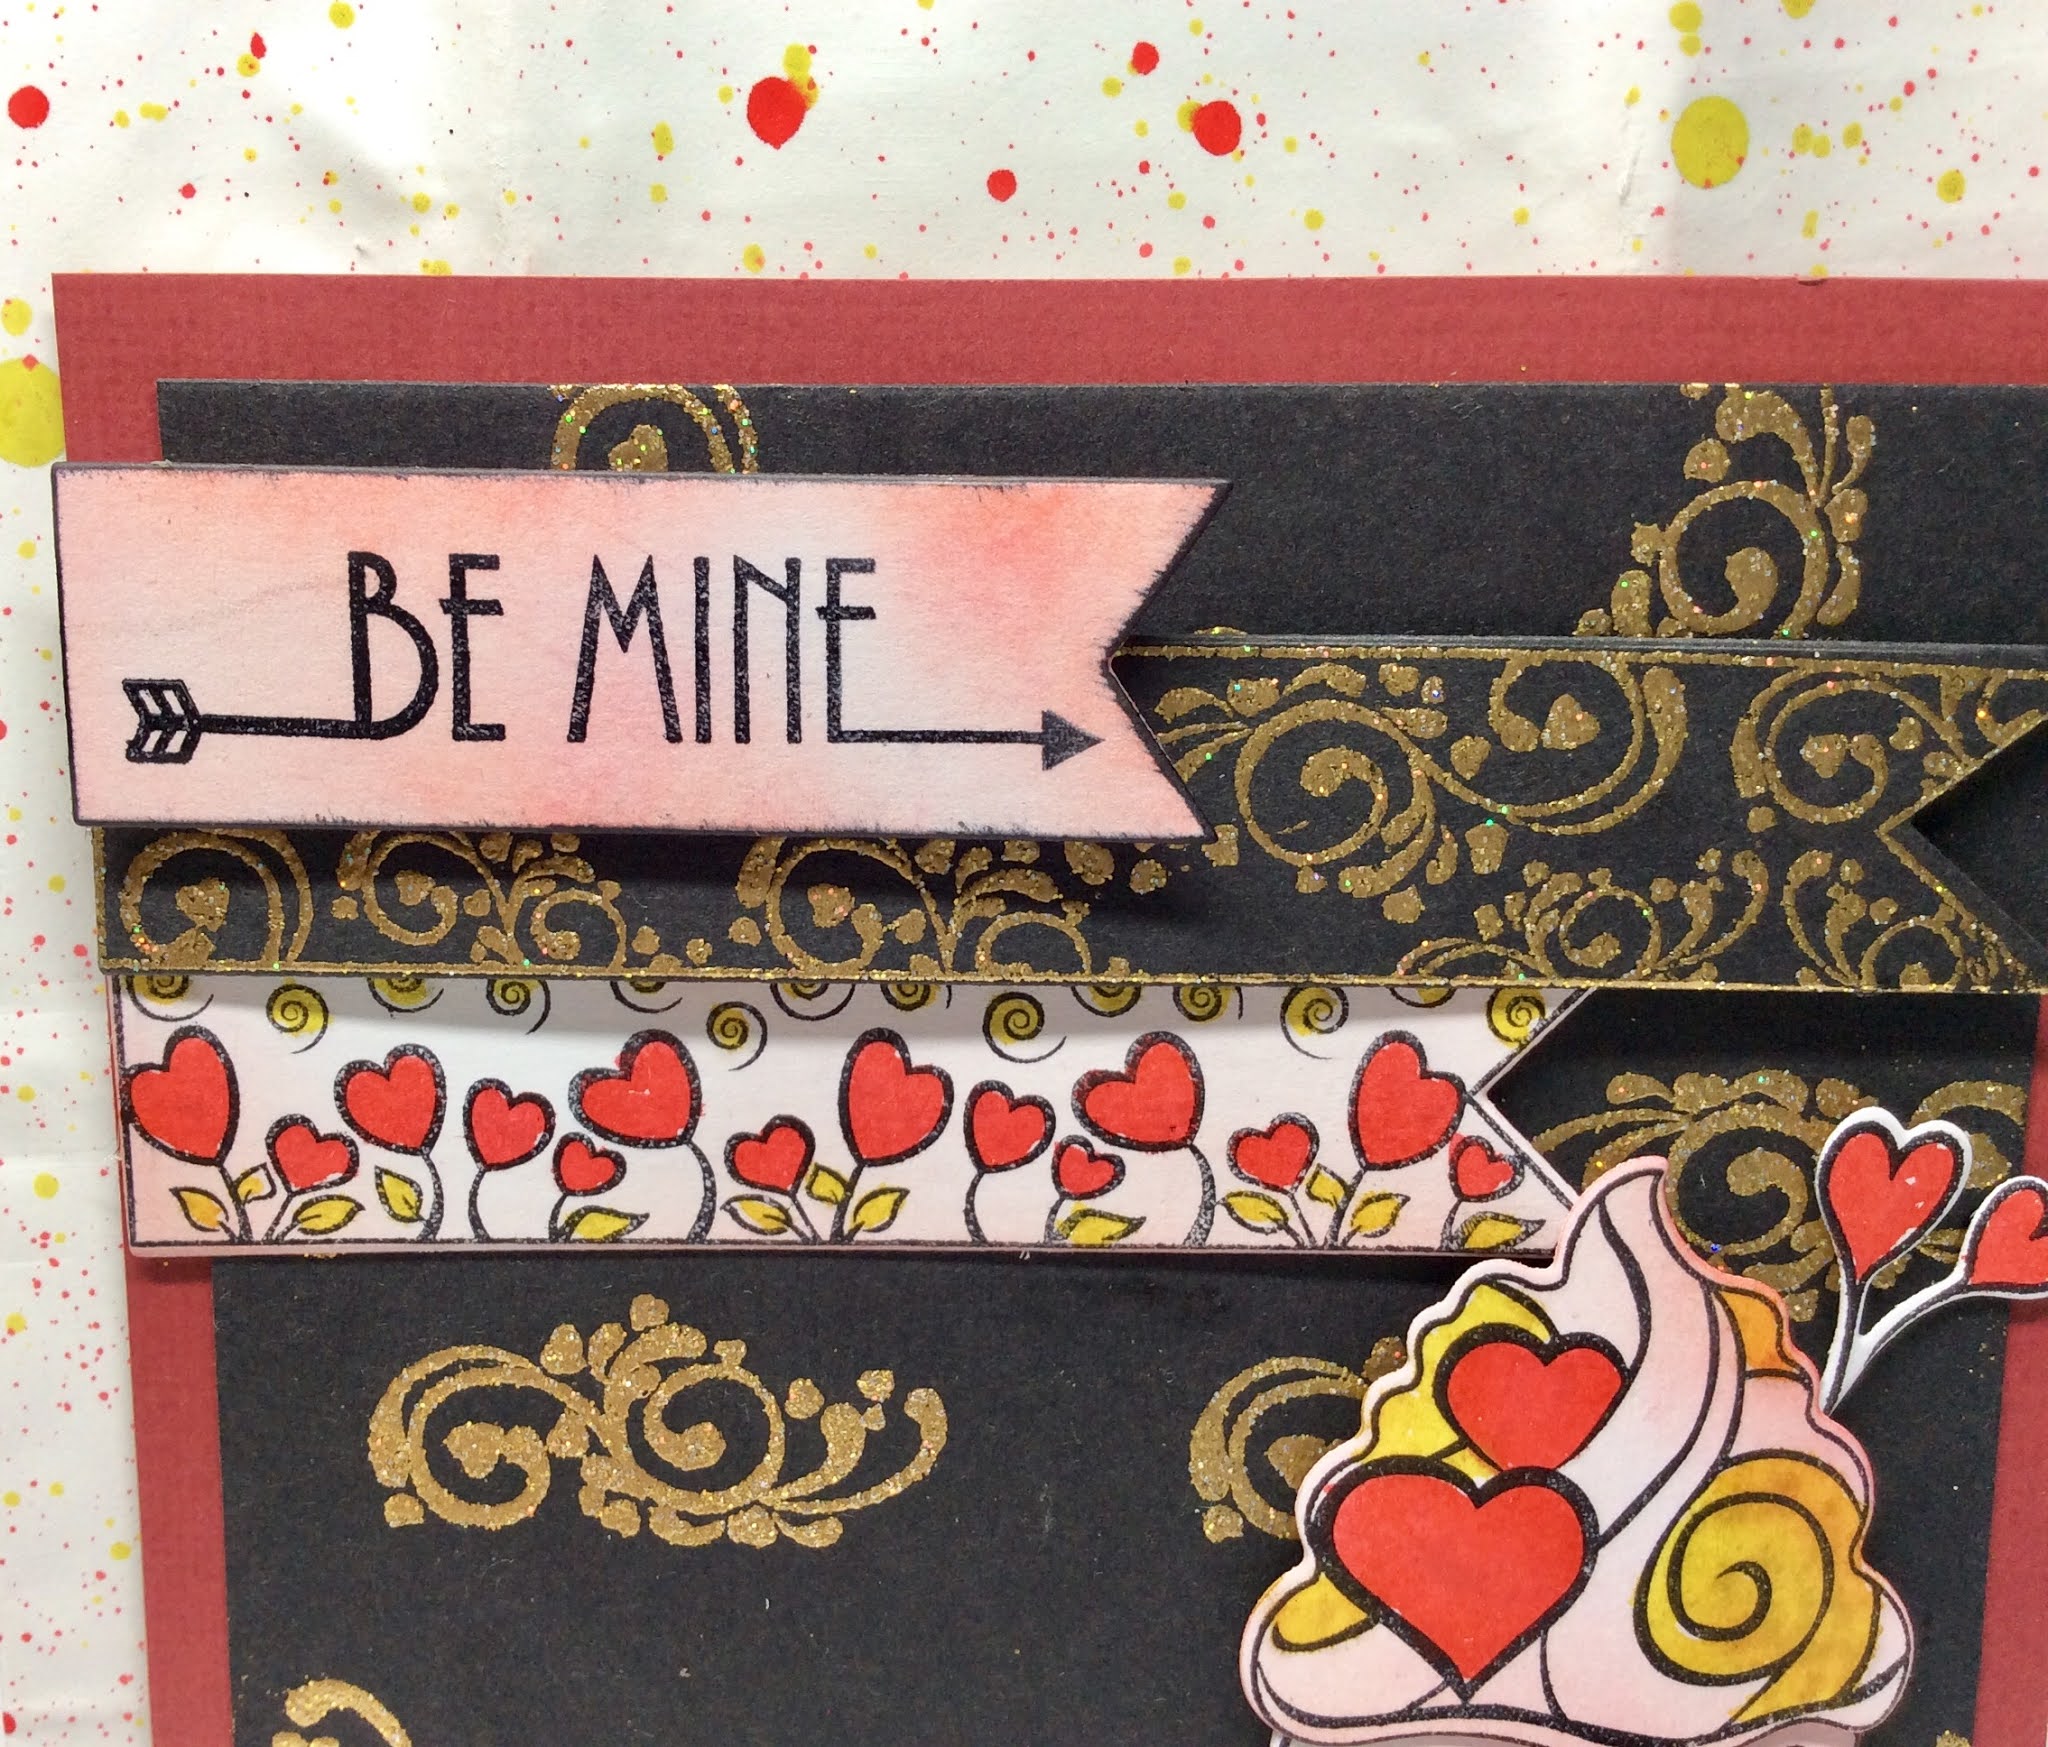
Here are the individual links for the products used in this project:

* Love Banner Stamp Set - https://www.prickleypear.com/love-banner-set/

* Banner Die Set - https://www.prickleypear.com/banner-die-set/

* Valentine Cupcake Stamp Set - https://www.prickleypear.com/valentine-cupcake-set/

* Build a Cupcake Stamp Set - https://www.prickleypear.com/build-a-cupcake-clear-stamp-set/

* Cupcake Die Set - https://www.prickleypear.com/cupcake-die-set/

* Wow! Embossing Products - https://www.prickleypear.com/embossing/

Thank you for looking and do please go over to the YouTube channel to see the project being made.  If you enjoy it do please like and subscribe.

Happy crafting,

Jane xx