Saturday 25 August 2018

Regal Rose ATCs for Bee Crafty

Hello!

For my project today on the Buzzy Goings on at Bee Crafty blog I have made a couple more ATCs (Artist Trading Cards) to add to my Bee Crafty collection that I am making.  This time I wanted to combine some of the different stamp sets that I love to create a new image...


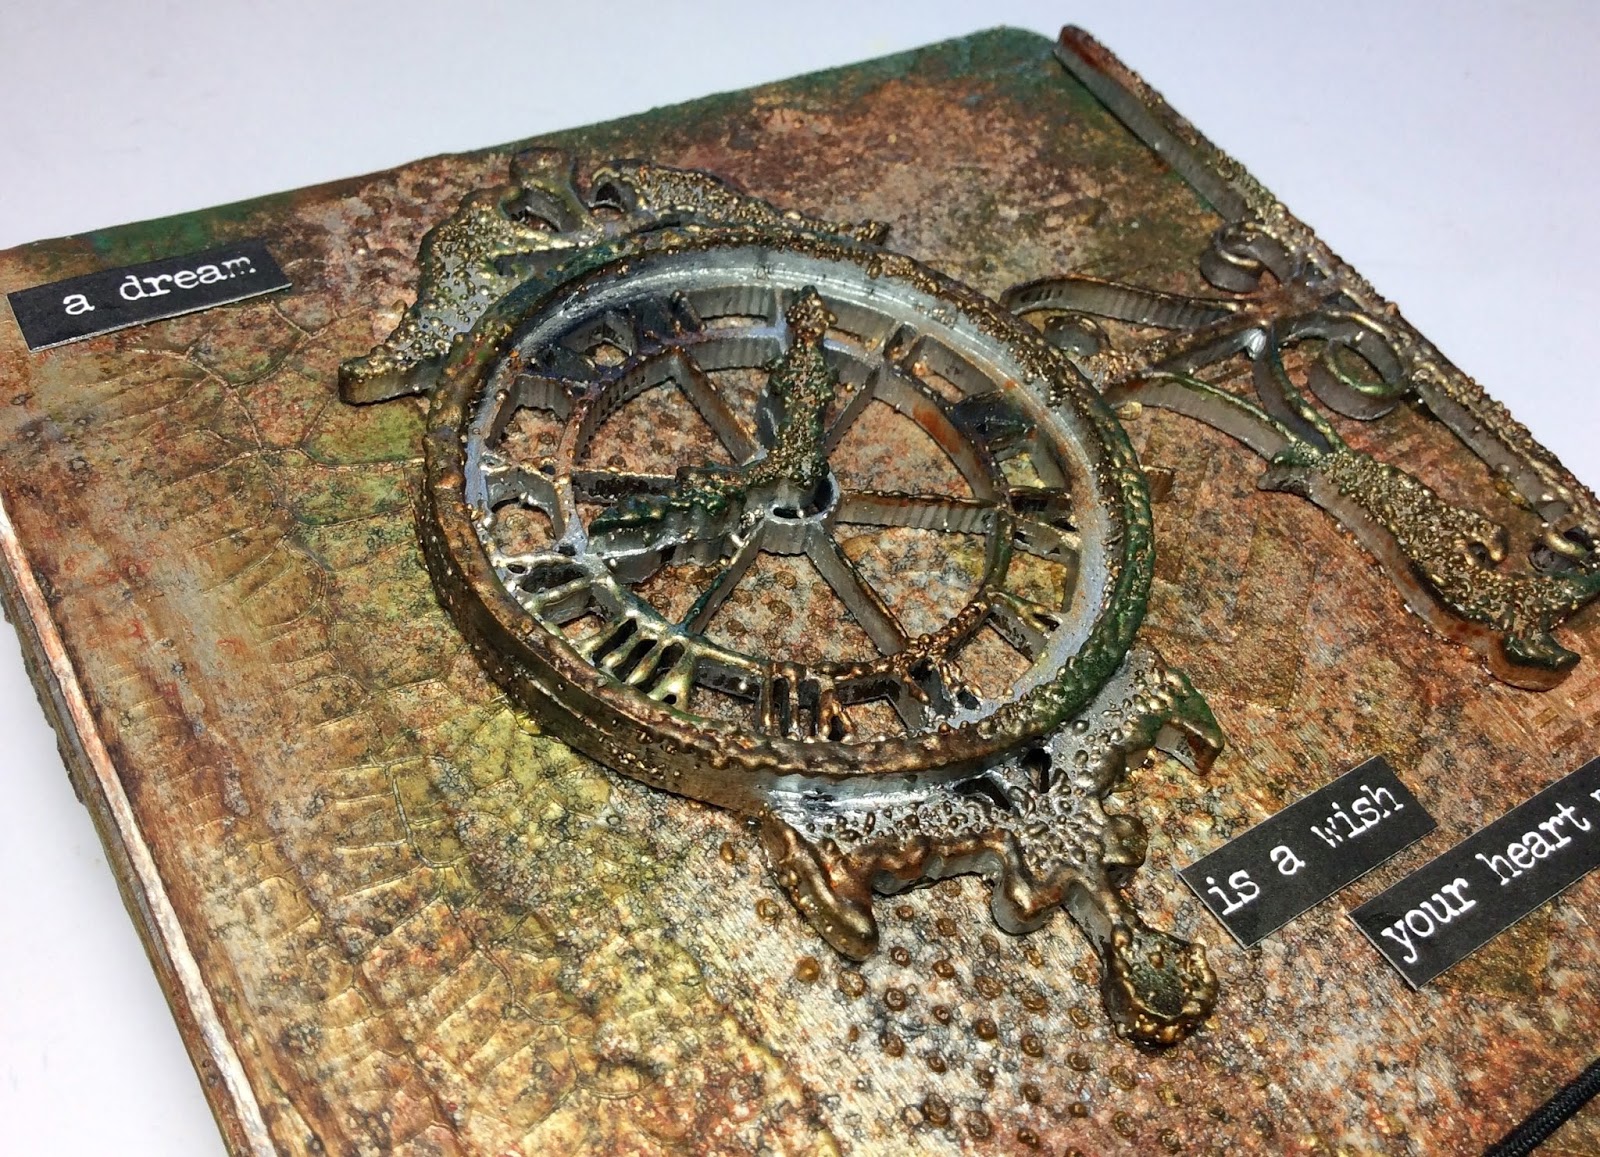
I started by prepping the bases with white gesso and then mixed some crackle paint up with a few drops of yellow acrylic paint.  This was then applied to the bases using a palette knife as I wanted to create some extra texture...


Once the paint had dried and the crackles developed I watered down some metallic gold paint to use as a wash over the top and also allowed some to drip from the edge...


At this point I had already decided on the images I wanted to use and so wanted to add some background stamping that had a regal feel.  I chose the multi mini distress diamonds stamp and used versamark and gold embossing powder to create pattern on parts of the background, I purposefully didn't ink the whole stamp to allow a distressed look.  I then used gold gilding wax to frame the edges of each of the ATCs...


I love wings so that formed the basis of the image that I wanted to create.  In the past I have combined wings with cogs, keys and hearts so wanted to use something different and chose the rose, just cutting off the main flower head.  I only needed one pair of wings, one rose and one crown as I wanted half of each to be on each of the ATCs.  After stamping and cutting out the images I coloured them using watercolour pens and inks and added some clear sparkle pen over the rose.  These were then added to the ATCs using glue gel...


As always my final touch had to be a sentiment for each ATC and I stamped these onto black card using a detail gold embossing powder...


To create my ATCs I used the following products...

* Art Stamps - Feather Wings
* Heraldic - Assorted Small Crowns
* Beautanicals - Large Rose
* Backdrops - Multi Mini Distress Diamonds
* Wordage - Live With No Excuses (small)
* Wordage - Never Regret (small)

I hope that you have enjoyed seeing how this project was created and thank you for looking.

Happy crafting,

Jane xx

Wednesday 22 August 2018

Crackle Mini Book for Tando Creative

Hello!

This week on the Tando Creative Blog the theme is crackle, one of my favourite techniques!
I decided to decorate one of the gorgeous mini books (quickly becoming an addiction!!) and used three different sorts of crackle for this project...

 
After using gesso to prepare the cover I used a technique that the lovely Di Oliver teaches in workshops to create a variety of crackle sizes using both weathered wood and crackle paint.  The paint was mixed in with some primary magenta to create the pink colour and once it had dried some beautiful crackles had formed...
 
 
To make crackles on the main flower I used crackle paste and then once dry painted with a darker version of the pink then added white antiquing cream.  The rest of the greyboard pieces were painted with a variety of fluid acrylics and then stamping added to the pieces and cover...
 
 
The final touches were some little bees that I stamped, cut out and coloured as well as some word stickers.  To create my closure I used a crop a dile and eyelets to add my ribbon to.
 
These are the products used:
 
* Decoart - White Gesso, Weathered wood, Crackle Paste, Crackle Paint, Fluid Acrylics
 
Happy crafting,
 
Jane xx


Saturday 18 August 2018

Banksy Circles for Bee Crafty

Hello!

Today on the Buzzy Goings on at Bee Crafty blog I am sharing a project that I made using some left overs!  When I decorated one of the MDF printer trays for a HOCHANDA show, I found I had lots of rectangular pieces of MDF left that came from the apertures.  I knew they would come in handy one day and so today I have used them to create a piece of home décor in the form of a hanging...


I started by choosing 3 pieces that were approximately the same size and used my crop a dile to make holes where I wanted to join the parts with jump rings at the end.   After preparing the MDF with gesso I applied Fresh Lime Dylusions paint to all three.  Then I took two of my favourite d'inkables (Circles and Chevrons) and used the Vibrant Turquoise and London Blue Dylusions paints with a stencil brush to add decoration...


To create some extra details I used a white and black pen to add some doodling.  I then took one of the Texture Border stamps and added some black archival ink...


I wanted some sort of border to each shape so ran the black inkpad around the edges of each piece of MDF then used one of the Style Wire Borders in places around them all.  Next to create my focal points I stamped the smallest style wire circle onto white card and cut them out leaving a slight border, I wasn't worried about getting a perfect circle.  I choose some of the smaller Banksy stamps and used the circles to create a highlight of different parts of the stamps...


To finish I used the main words from the Ticker Tape sentiments and a piece of old jewellery to add as a charm to the bottom of the hanging.

Here are the products I used to create this project:

* Inspired by Banksy - Hope, Girl Watering Aerial, Love Hill
* Wordage - Ticker Tape Sentiments
* Backdrop Borders - Texture Borders, Style Wire Borders
Backdrop Frames - Style Wire Circles
* D'Inkables - Circles, Chevrons
* Dylusions Paint - Fresh Lime, Vibrant Turquoise, London Blue
* Archival Inkpads

Thank you for looking and happy crafting!

Jane xx

Saturday 11 August 2018

A Poppy For You for Bee Crafty

Hello!

Today on the Buzzy Goings on at Bee Crafty blog I am sharing a card with you that I made with one of the beautiful BEAUtanical stamps...


I started by stamping the poppy onto a piece of card and coloured it using watercolour markers.  Next I coloured the background using distress oxides and then spritzed the card with water to blend the blues, this also caused some of the watercolour pens to bleed into the background which I liked...


Then I used some of the texture border and circle stamps along with the script XL to create more interest in the background.  After that I restamped the main parts of the poppy again, cut them out and stuck them on top of the original flower...


I added some doodling with black and white pens on the stem and around parts of the image before using one of the large everyday sentiments to finish off the card. 

To create this card I used...

* BEAUtanicals Large - Poppy
* Backdrops - Script XL
* Backdrops - Texture Circles
* Backdrop Borders - Texture Borders
* Wordage - Everyday Sentiments 1 XL
* Distress Oxide Inks

Thank you for looking and happy crafting,

Jane xx

Thursday 9 August 2018

Frangifantastic Notebook for Butterfly Squad Creative Team


Hello!

Today I am really pleased to be able to share with you my first personal project that I have made as part of the France Papillon Butterfly Squad Creative Team. 

Here is the notebook that I made and you can find a step by step tutorial for it over on the France Papillon blog...

http://www.france-papillon.com/single-post/2018/08/09/Butterfly-Squad-creative-team-inspiration-Jane


Happy crafting,

Jane xx

Wednesday 8 August 2018

Artful Flight ATC's for Tando Creative

Hello!

This week on the Tando Creative blog the theme is wings.  I have realised over time that much of what I create seems to incorporate wings in one form or another and today I am sharing two ATC's that I created using the steampunk wings and cogs...


I started with the greyboard ATC blanks by Tando and used sand texture paste through the mini cog stencil.  I wanted half of the winged cogs on each ATC and as the greyboard is more pliable than other substrates I was able to cut the pieces I needed in half with scissors.  These were then glued to the ATC's and some layered up.  After this both of the boards were both coated with tinting base...


Next I mixed some crackle paint with green gold and cobalt teal hue acrylics and painted the whole of both pieces again.  Once dry I used layers of blue acrylic paint in washes (cobalt teal, cobalt blue and phathlo turquoise) drying in between layers and then finishing with some quinacridone gold.  To help the edges of the cogs and ATC stand out I dry brushed some metallic gold paint across them then used some sepia archival ink which I applied using a sponge...


To finish I added metallic gold splatters and a couple of word stickers.

To create my project I used:

* Greyboard ATC's
Steampunk Wings and Cogs
* Tando Mini's - Cogs
* Mini Cogs Stencil
* Decoart Mediums
* Decoart Fluid Acrylics

There will be more winged inspiration throughout the week which I can't wait to see!

Thank you for looking and happy crafting,

Jane xx

Saturday 4 August 2018

Beautanical samples for Bee Crafty

Hello!

Today on the Buzzy Goings on at Bee Crafty blog I am sharing the MDF samples that I made for the fab shows that Bev did this week on HOCHANDA.  If you missed any of the shows and demos then you should still be able to catch up using the rewind service on the HOCHANDA website.

The square art board was decorated using crackle paste and acrylic paint then some gold sparkle pen to create a fairyland feel.  I stamped and gold embossed the teasels onto acetate, and some of them were stuck on the opposite way round to create different shades and to face a different direction.  To finish it off I added a few of the small butterflies also embossed with gold powder...


I coated the tag board with black gesso and then stamped the dandelions with versamark before embossing with white powder.  The sentiment was stamped onto black card and cut up before some extra 'seeds' were created using white paint splatters...


The MDF tag was coloured and then I used archival inks in a variety of colours with lots of the different stamps to create a layered look.  To frame the tag I used some more archival ink around the edges and finished with a sentiment and some organza ribbon...


For these projects I used:

* Beautanicals Set - Dandelion
* Beautanicals Set - Teasels
* Beautanicals Set - Elder
* MDF - Square Art Board
* MDF - Tag Art Board
* MDF - Tag

Thank you for looking and happy crafting,

Jane xx


Friday 3 August 2018

Creative Artiste: Time Travellers Angel

Hello!

As it is the first Friday of a new month it must be time for a new challenge over on the Creative Artiste Mixed Media Challenge blog...

Thank you so much for all the wonderful entries last month, to find out who was chosen as the winner you can link to the challenge blog HERE, whilst there you can also check out this months  challenge post with all the DT inspiration and information about how to enter.
 
This month our prize is being sponsored by Samantha K who is giving away a lovely MDF swing set...
                                                                                                      
To create my DT project I used an MDF clock from Samantha K as one of the focal points on my travellers journal created using Eileen Hull's die...


The background of my journal was created using stencils with texture paste, sand texture paste, crackle paste and a pitted metal technique that Andy Skinner teaches using fluid acrylics.  The clock was rusted using paint and texture paste and then some Stampendous embossing powders...


To create another point of interest at the bottom of the journal I used the angel stamp from Carabelle.  To help her blend in with the rest of the background I coloured her with similar tones and added some of the embossing powder to parts of her wings and body...


For the final touches I used some of my stash of metal elements and micro beads to add extra dimension and texture and then the sentiment using some Tim Holtz stickers...


I loved using lots of texture and techniques on this journal! 
Please do take a moment to check out this months challenge and it would be fantastic to see some of your projects there. 
 
Happy crafting,
 
Jane xx

Wednesday 1 August 2018

Altered Eclectics: Crazy Bird Journaling

Hello!

I hope you are having a fab summer (if it is summer where you are) at the moment.  The weather here has certainly been way above average for us and amazingly we are now already in August!

A new month so a new challenge over at the Altered Eclectics challenge blog and a big thank you to those who entered last month, it is lovely seeing such a variety of projects and styles.  As always the challenge is anything goes altered art or mixed media BUT no cards or ATC's, please click HERE to go over to the challenge blog to find all the details.

This month I decided to alter some pages in my art journal.  It was a spread that I had already started a while ago, but my background had got very busy and I wasn't liking it at all, so I decided to cover it up with some white gesso and alter the pages...


What I really liked was that although I covered the background the gesso still allowed it to show faintly through which added another dimension.  I used Dylusions paints with stencils and focussed the bright green around the edge of the pages.  After this I used my posca and uniball pens to add some doodling, then put some paste through another stencil for a bit of extra texture...


As the page was quite bright and abstract I decided that the Tim Holtz crazy birds would be perfect so chose three which I stamped and die cut, these were then coloured with watercolour markers.  I chose some accessories and did the same with these, adding some Decoart liquid glass and also to the birds eyes...


The sentiment was one from Dyan Reavley which I stamped and cut up before adding to the pages...


The final touch was a little more doodling to give the birds a perch each.  In the end what had been a page that I wasn't at all happy with became one which I love, so the sentiment was really true!

Happy crafting and do please check out the challenge, it would be great to see your projects,

Jane xx